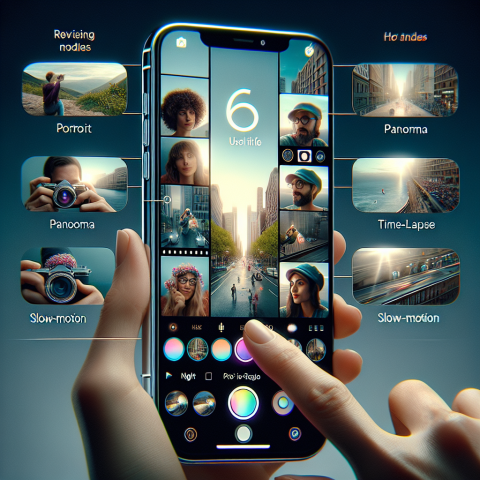
iPhone Camera – If you’re a photography enthusiast like me, you probably know how exciting it can be when a phone comes with a killer camera. Over the years, iPhones have consistently raised the bar, and as someone who loves snapping photos on the go, I’ve gotten to know the ins and outs of their camera features. Some are obvious—like the portrait mode everyone raves about—but others? Well, they might surprise you. In this post, I’m sharing the 6 best iPhone camera features I’ve personally come to love for photography.

Exploring the 6 Best iPhone Camera Features for Photography Lovers
1. Night Mode: Perfect for Low Light Shots
Let’s start with one of my absolute favorites—Night Mode. It’s honestly a game-changer for those of us who love taking photos after the sun goes down. I can’t tell you how many times I used to struggle with low-light conditions, coming home from a concert or event and finding my photos completely blurry or grainy. Night Mode makes all the difference.
What’s cool about it is that it automatically kicks in when it detects low light, but you can also manually enable it in certain situations. When it’s on, the phone takes a few seconds to capture multiple images and then merges them into one super-detailed, bright shot. This feature has been fantastic for those spontaneous nighttime shots that I would have totally missed before. Seriously, it’s like a little magic trick for your phone’s camera.
Pro Tip: Try holding your phone really still during the shot, especially when you’re in the “long exposure” zone. I’ve learned the hard way that even a slight shake can mess with the final image. So, tripod or steady hands are key!
2. Portrait Mode and Portrait Lighting
If you’ve ever wanted to take professional-looking portraits with your iPhone, you’ve probably used Portrait Mode. It’s been around for a while, but the improvements over time have made it even more impressive. What I love most about Portrait Mode is how it blurs the background, focusing on the subject, so everything else feels dreamy and out of focus. It’s the perfect way to make an everyday moment look like it was taken in a studio.
But wait—there’s more! The Portrait Lighting feature lets you adjust the lighting around your subject. You can simulate different lighting setups like “Stage Light” (a moody spotlight effect) or “Contour Light” (which adds shadows for a more dramatic look). These effects used to require a DSLR and a whole set of studio lights, but now they’re at your fingertips.
Pro Tip: Experiment with different lighting effects, but don’t overdo it. Sometimes simple, natural light makes the best portraits. And don’t forget to play around with the Depth Control in the photo editor to adjust the background blur after you’ve taken the shot.
3. Deep Fusion
Okay, so this is one of those features that you might not immediately notice, but trust me, you’ll appreciate it once you start using it. Deep Fusion is all about improving details and textures, especially in medium-light environments. Think of it as the “secret sauce” that makes your photos look incredibly sharp without any of that harsh digital noise that can sometimes ruin a shot.
I first noticed the magic of Deep Fusion when I took a close-up photo of a flower and was amazed at how detailed the petals looked. There was this almost three-dimensional quality to the image. It’s activated automatically when the light isn’t too bright and isn’t too dark, so I don’t even have to think about it.
Pro Tip: Deep Fusion doesn’t work with Portrait Mode or low light settings (like Night Mode), so keep an eye on your lighting to get the best results. But when you hit that sweet spot, your photos will pop.
4. Macro Photography
Now, if you’ve got an iPhone 13 or newer, get ready to dive into macro photography. I didn’t know how much I’d love this feature until I used it for the first time—taking ultra-close-up shots of tiny details, like the texture of a leaf or the droplets of water on a spiderweb. It’s almost like having a tiny, portable microscope right in your pocket.
What’s cool about the iPhone’s macro feature is that it can automatically switch to macro mode when you get really close to something, which is kind of fun to watch in action. You don’t have to do anything special—it’s all handled for you. But if you want to take full control, you can tap to focus on your subject and even adjust exposure for the best effect.
Pro Tip: It might take a little getting used to, but try to steady your hand as much as possible when shooting really close. Even the tiniest shake can throw off the sharpness of your macro shots. A steady grip is key to capturing those super crisp images.
5. Smart HDR 4
When I first started using Smart HDR, I didn’t think it would be such a big deal. But after taking a few shots with it, I realized just how powerful it is. This feature combines multiple exposures to create the most balanced image possible, even in tricky lighting. The result? Better details in both the bright and dark areas of your photo, which is perfect for high-contrast scenes.
I’ve found that Smart HDR 4 does a particularly great job when I’m photographing sunsets or other scenes with a lot of contrast. In the past, I’d either end up with a blown-out sky or a dark, underexposed foreground. But now, my photos look more natural and detailed all across the frame.
Pro Tip: Don’t be afraid to tweak things in the editing tools after you take the shot. While Smart HDR works wonders, sometimes the post-processing options can bring your photo to life even more.
6. ProRAW and ProRes
This one’s for the serious photo and video enthusiasts: ProRAW and ProRes. If you want full control over your images, these features are a game-changer. ProRAW gives you the flexibility to edit your photos with more detail than regular JPEGs or HEICs, so you can adjust everything from exposure to white balance without losing any quality.
The downside is that ProRAW files are huge, so you’ll need lots of storage, but the extra control is worth it if you’re looking to take your photography to the next level. I’ve used ProRAW for editing photos of landscapes or architecture, and it allows me to push the photo even further in editing, whether it’s adjusting shadows or bringing out colors.
ProRes is the video counterpart to this—offering high-quality, professional-level video for filmmakers. If you’re into video content creation, this feature lets you capture beautiful, high-definition footage with a lot of editing flexibility.
Pro Tip: ProRAW is great for people who are familiar with photo editing software (like Lightroom or Photoshop). If you’re not used to working with RAW files, it might be a bit overwhelming at first. But once you get the hang of it, it’s a huge upgrade.
Wrapping It Up
These iPhone camera features have completely transformed how I approach photography. Whether I’m shooting portraits, capturing low-light moments, or diving into detailed macro shots, I always know my iPhone has my back. The best part? These features are always improving with each new iPhone release. So, if you’re a photography lover who’s still not fully embracing your phone’s camera, I highly recommend diving in and exploring all these powerful tools. Trust me, once you do, you’ll be seeing your iPhone as more than just a device—it’ll be your portable photography studio.


